


This is a two-part series on app development pre-planning, or mapping, as we call it. In Part 1, we shared what app development mapping is and why it’s an important part of a software deployment strategy. Here in Part 2, we will explore the steps involved in the mapping process so you can plan your next steps with confidence.
Before any development or coding is done to create an application or software, there is an important process that will help minimize obstacles in the development journey. This pre-planning process, or “mapping” as we call it, can be the most vital part of a software deployment strategy.
As such, if you are considering a new business software or application, here are steps to help prepare you to launch your app effectively.
1. Define your app concept
Start by clearly laying out the concept of your app. Prepare a short description of your app so you can convey the core idea in simple terms. Broadly define the concept by answering these questions:
- What business need or problem are you trying to solve?
- What are your expectations for the app?
- How will the app function?
- How will it engage and be useful to end-users?
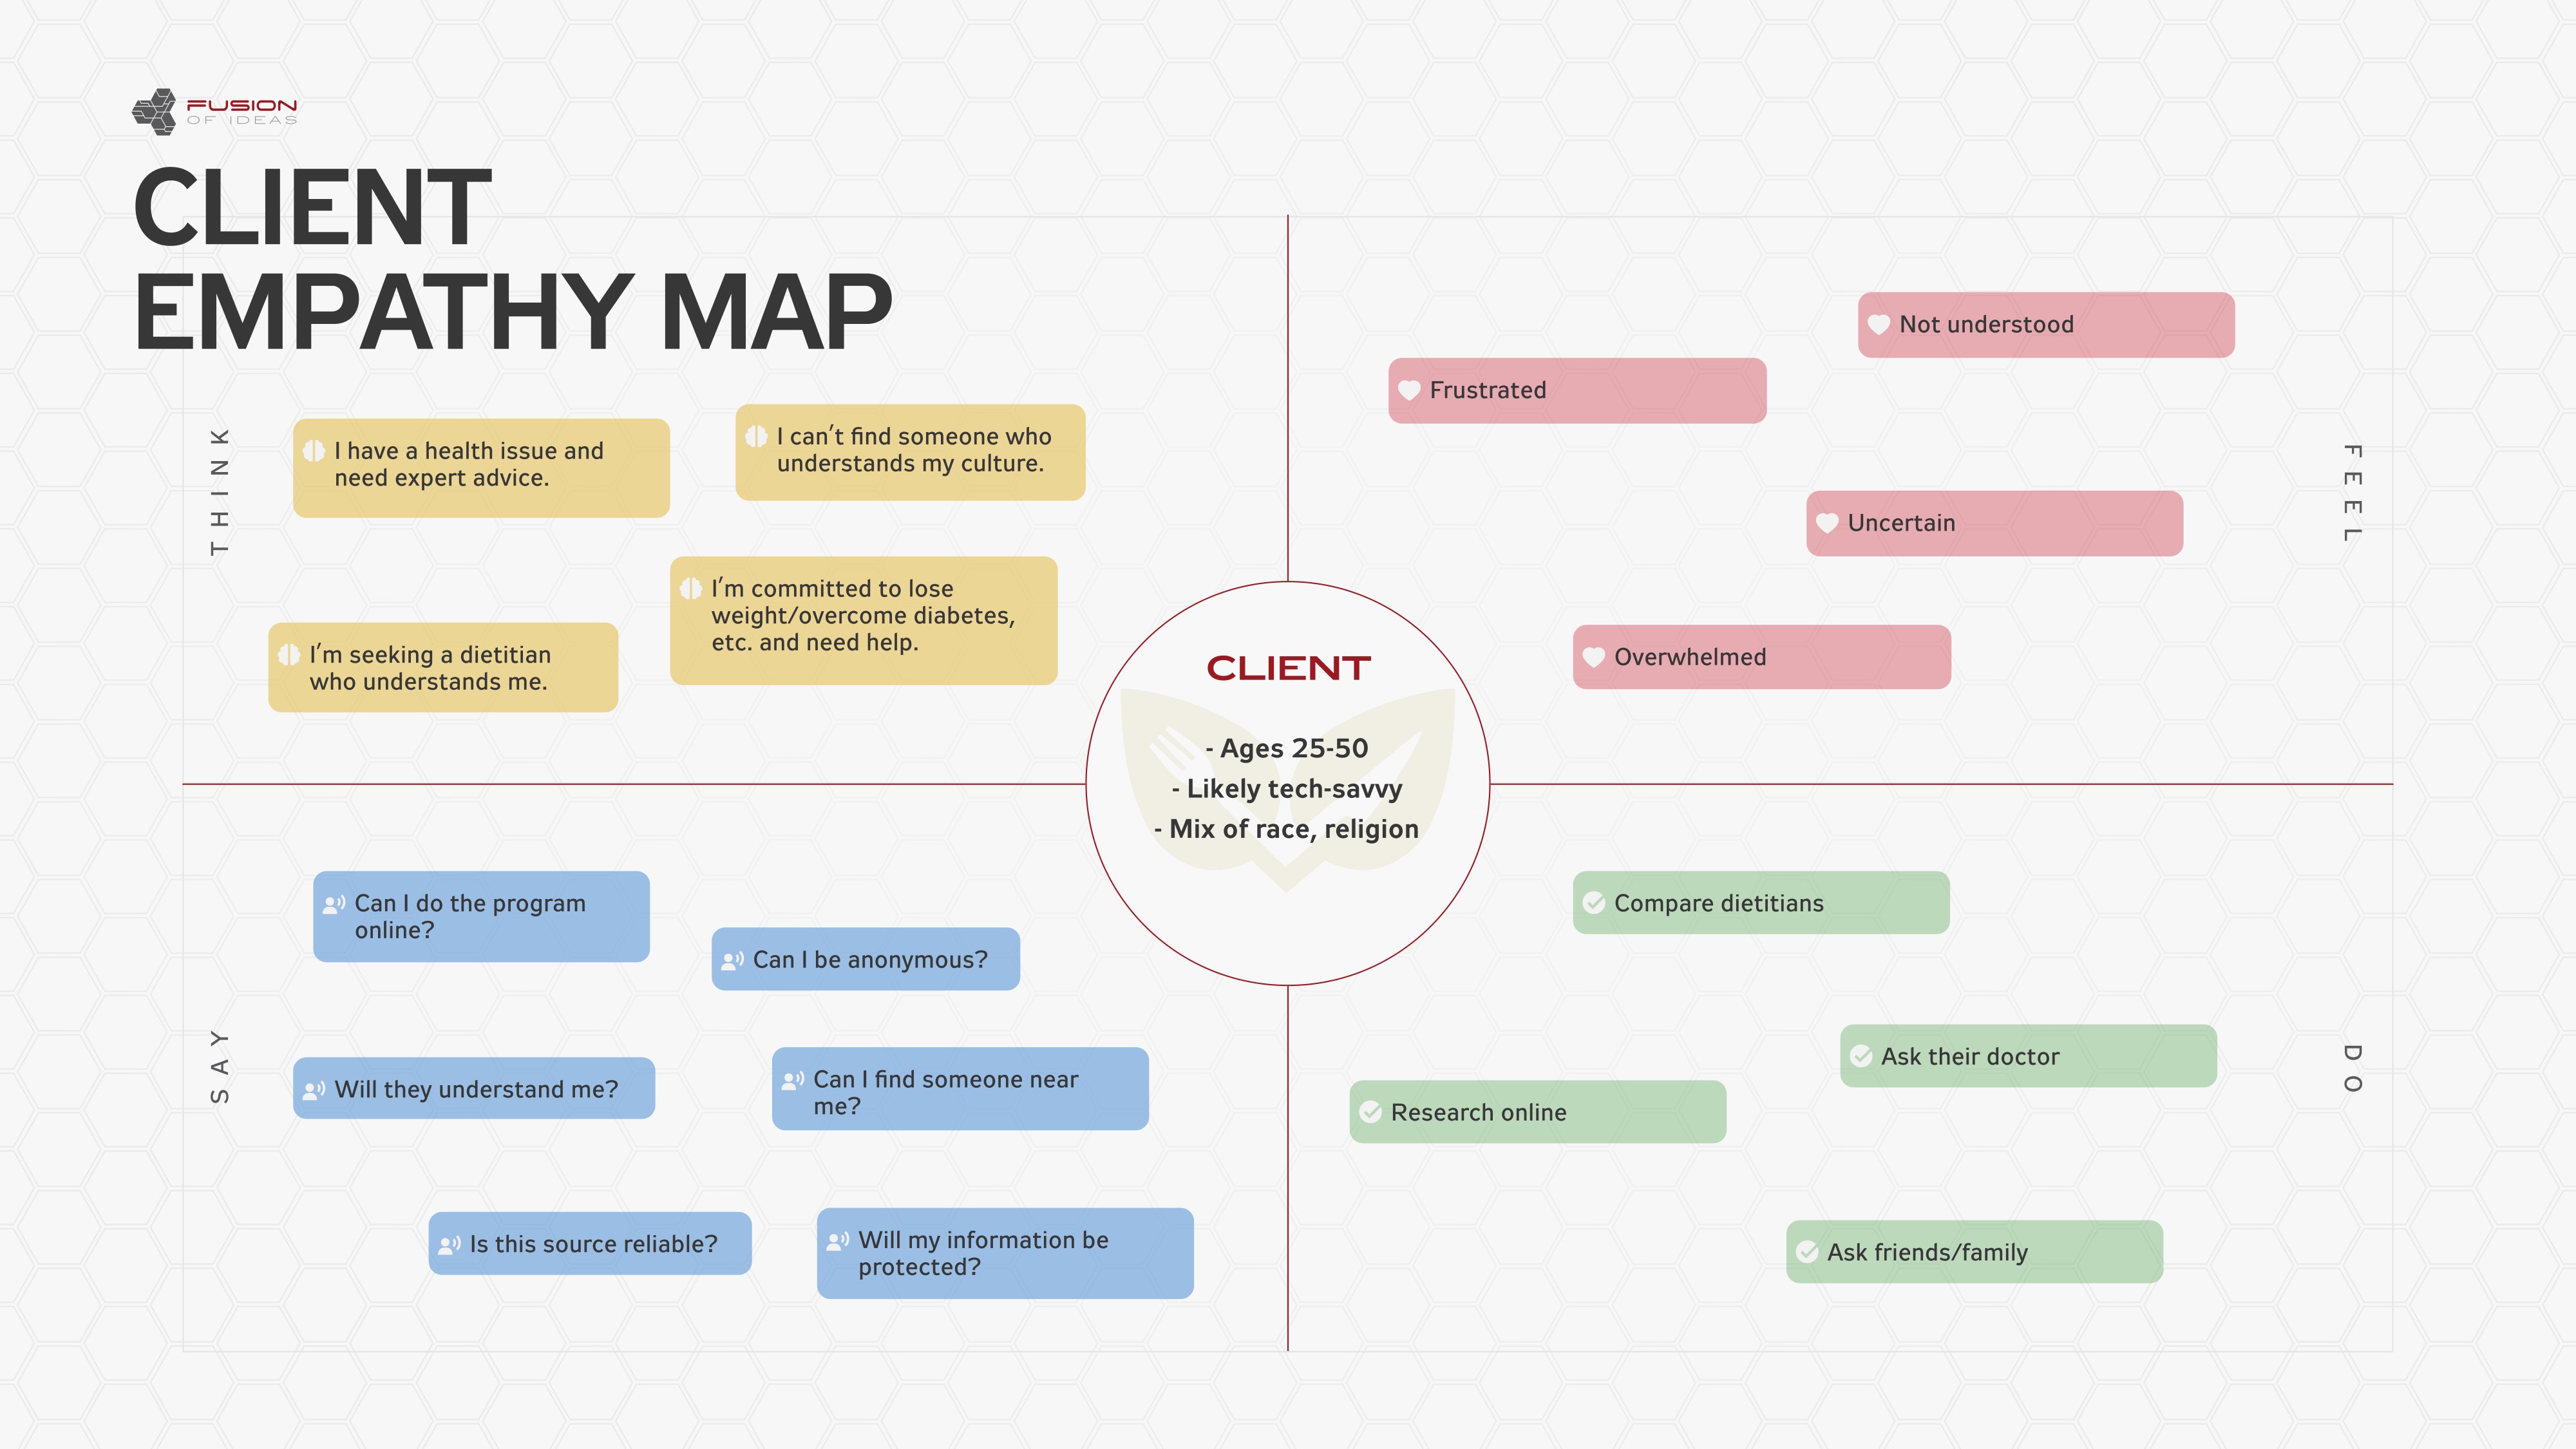
2. Identify target users
Have a clear understanding of the intended end-users. Additionally, invest time and effort into researching and understanding their characteristics. Create an empathy map to describe those characteristics, which will ultimately serve as a guide to how your app will be designed.
3. Identify key project stakeholders
It’s also important to identify the roles and responsibilities of each person who will be involved with the app development strategy. These roles may include a project manager, who will communicate with external contacts, such as developers; and decision-makers who need to be involved in the approval process. It is recommended to include people from different departments in your organization in order to gain a variety of insights.
4. Consider the user experience
Using research on your end-user(s), determine what the app’s user experience will look and feel like. For example, if the end-user will be using the app on a construction field with gloves, you may want to consider screens that have minimal typing fields. Make a list of requirements for the best user experience.
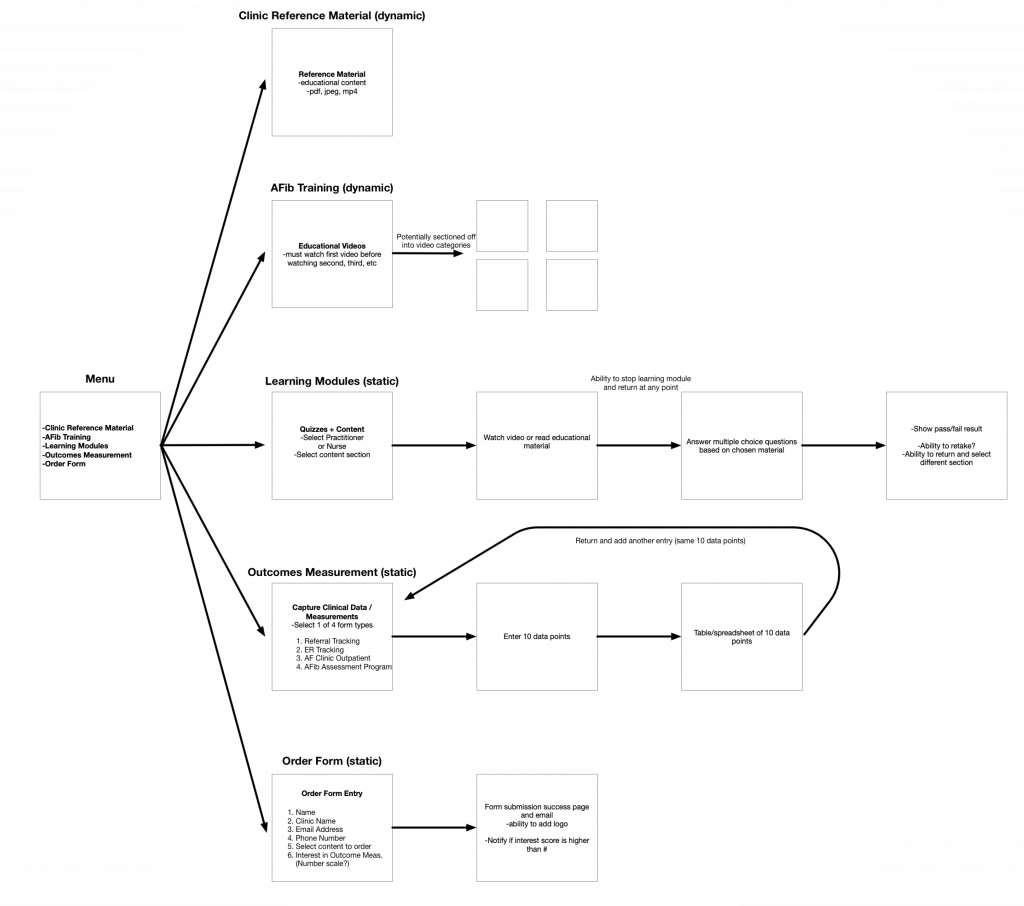
5. Create the application flowchart
The creation of a flowchart allows you to translate your app idea into a visual aid illustrating the app idea, workflow and functionalities. A flowchart should represent the anatomy and high-level functionality of your app.
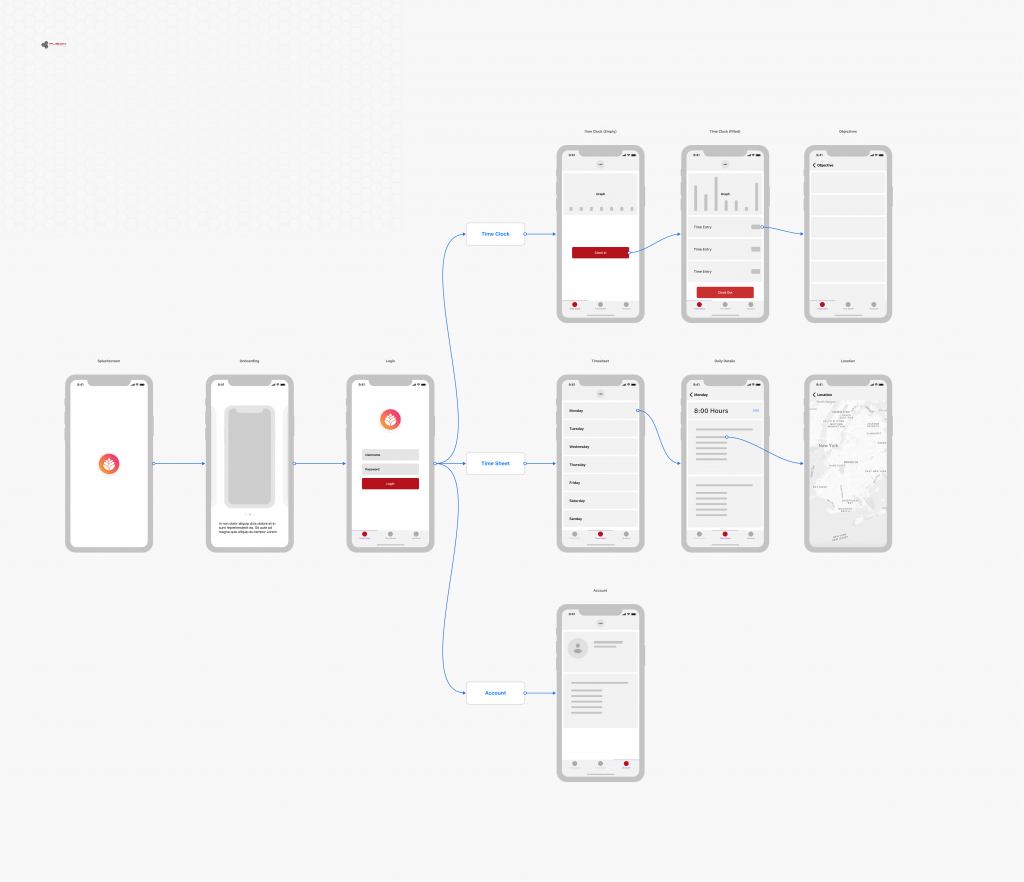
6. Create wireframe models
Wireframes are essentially blueprints to detail each screen within your app. They are the first step toward defining the user experience of the application. Low-fidelity wireframes show basic content, while high-fidelity wireframes are more complete representations of the end product.
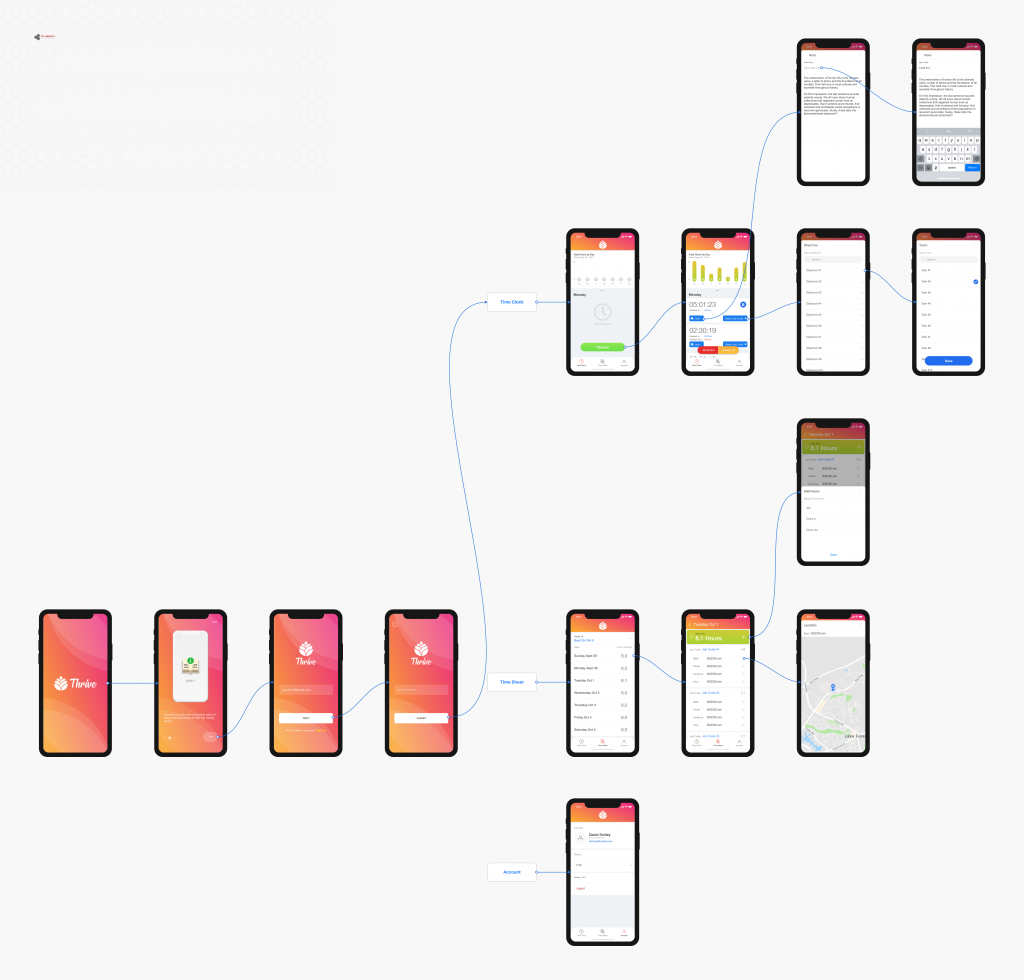
7. Create a prototype
A prototype is an interactive interface that mimics the actual look and functionality of the application. Typically, the prototype is created as the final stage of the design before development begins. An application prototype is powerful in two ways:
- Having a holistic view of the design, functionality and user flow allows you to make calculated decisions prior to development, which can save money and time spent on changes further down the road.
- The prototype can be used to showcase your app idea to potential investors if you need to gather early-stage investments.
One last step…Once your app is launched, it will eventually require updates and maintenance like bug fixes. In your deployment strategy, consider the level of support and maintenance that will be required based on your internal resources and budget.
The app development journey may seem daunting. We get it. That’s why we offer mapping services to help guide you through the pre-planning phase.
We will also help you determine whether the best deployment strategy is to utilize existing software or build your own if you are unsure. We will guide you through the steps above and create deliverables that are yours to keep – everything from user research to wireframes and prototypes to technical scope documentation.
By the end of the mapping process, you will be equipped with a software deployment strategy so you can plan your next steps with confidence. To explore more about FUSION OF IDEAS’ mapping process, contact our App Development Business Development team at info@fusionofideas.com.


 Why is pre-planning important?